

We ship Tiles as a tar.gz tarball and as a native macOS .pkg. Either format follows the same broad steps.
Assemble the deliverable:
Package the Tiles binary and the Python venvstack artifacts into one installer payload.
Run the installer:
Copy the Tiles binary and Python artifacts into the correct locations on disk.
Run postinstall scripts.
In early releases, the tarball was the only install path. It served us well, but it had clear limits.
Because the release artifact is a gzip tarball, we cannot codesign, notarize, and staple the archive itself the way we can a full installer. We run those steps on the Tiles binary only, not on the entire
.gzfile.Installation relies on a curl-based script. That is workable for developers and rougher for everyone else.
The flow leaves little room to tailor copy, branding, or steps in the installer UI.
We wanted a path that fits Apple's signing and notarization story and feels native on macOS. Installers ship as .dmg or .pkg bundles; we chose .pkg because it can run scripts, uses a familiar installer UI, and supports customization with simple HTML. What follows is how we build that .pkg for Tiles.
Install file structure
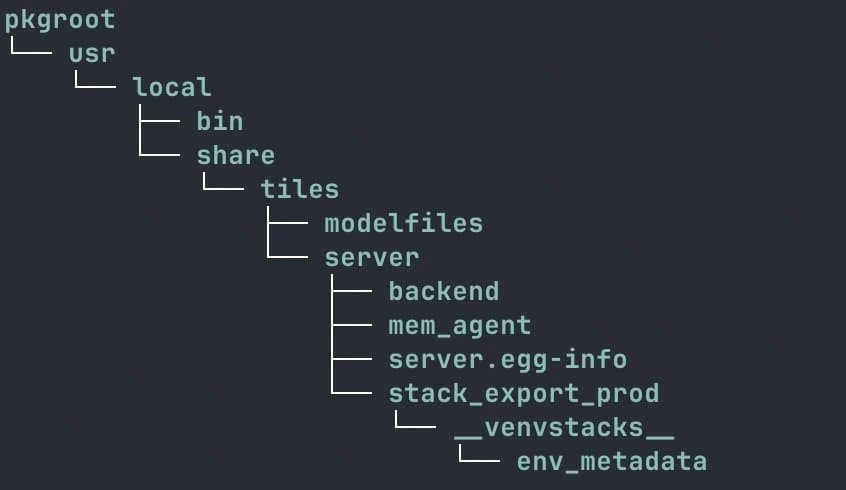
The layout matches the directory tree above. When we build the package, we point the tooling at this pkgroot directory as the install root. The installer copies that tree onto the destination volume and creates intermediate directories as needed.
For each release, we build a fresh Tiles binary into pkgroot/usr/local/bin and place the remaining updated artifacts under pkgroot/usr/local/share/tiles/.
The build script in the repo has the full sequence.
Code signing the Tiles binary
Code signing gives us:
A signed Tiles binary that cannot be altered without invalidating the signature.
A signature from a developer certificate that Apple trusts.
You need an Apple Developer account and two certificate types: DEVELOPER ID APPLICATION for the binary and DEVELOPER ID INSTALLER for the .pkg. The finished installer wraps the signed binary and the other artifacts in one compressed package.
For creating and exporting those certificates, the CodeVamping macOS pkg installer article covers the details.
# Signing the Tiles binary
codesign --force \
  --sign "$DEVELOPER_ID_APPLICATION"\
  --options runtime \
  --timestamp \
  --strict \
  "${CLI_BIN_PATH}/tiles"
The snippet signs the Tiles CLI. $DEVELOPER_ID_APPLICATION is an environment variable that holds the common name of the Developer ID Application certificate.
Scripts
Bash scripts can run before and after the payload is laid down. We keep preinstall and postinstall scripts in a directory and pass that path into pkgbuild.
The Tiles repo has those scripts; they handle cleanup and internal setup.
Building the Tiles package
With the signed Tiles binary and the rest of the install tree under pkgroot, we run:
pkgbuild --root pkgroot --scripts \
 pkg/scripts --identifier com.tilesprivacy.tiles --version "$VERSION" \
 pkg/tiles-unsigned.pkg
--root is pkgroot; --scripts points at the directory from the previous section.
Customizing the installer
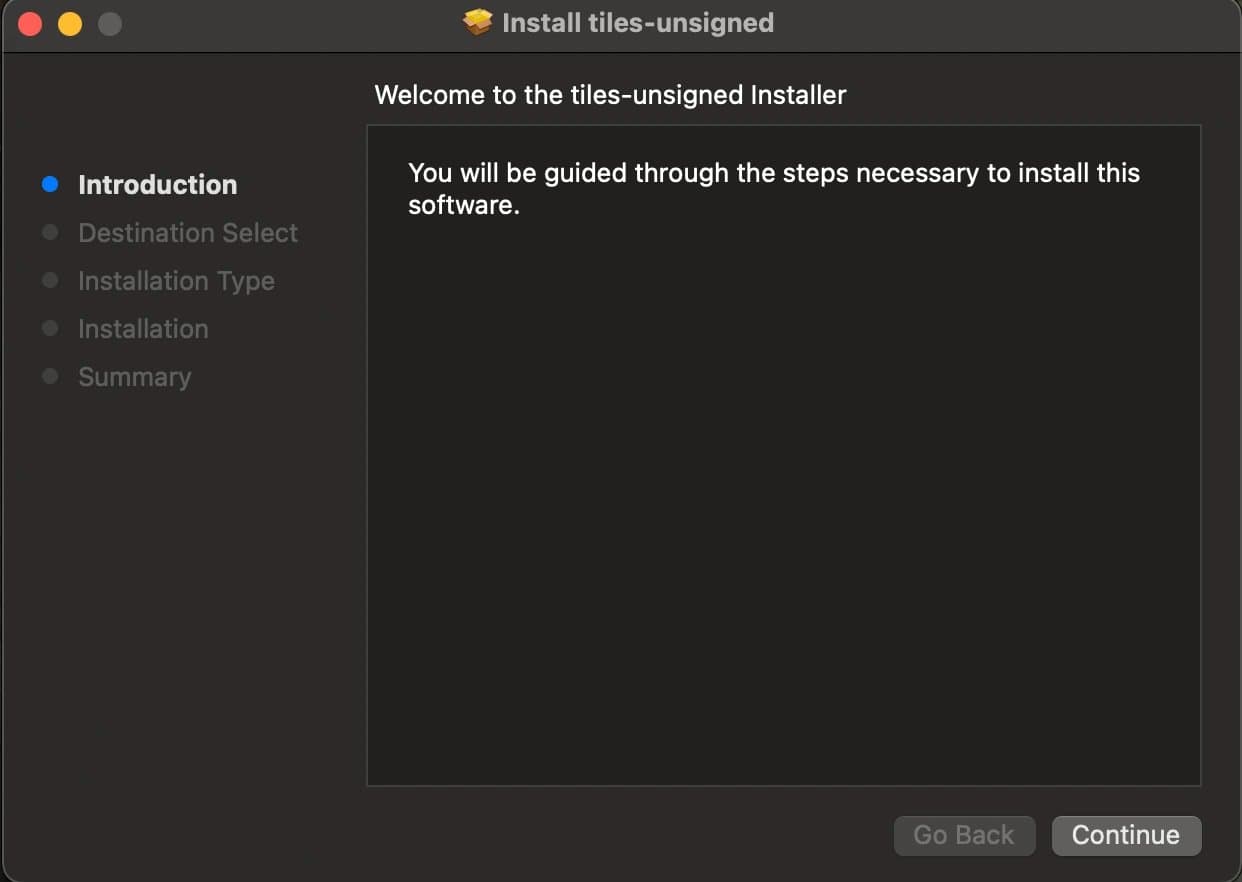
Opening the unsigned package from the previous step shows Apple's default, minimal flow. We layer on welcome and conclusion screens, a logo, and other panels with an Apple distribution definition in XML. That file references HTML for the welcome, conclusion, and other supported steps. Our distribution_network.xml is the working example. Elements such as <welcome/> and <conclusion/> point at resources we keep alongside the definition and pass into the final productbuild invocation.
productbuild \
  --distribution pkg/distribution_network.xml \
  --resources pkg/resources \
  --package-path pkg/  \
  pkg/tiles-dist-unsigned.pkg
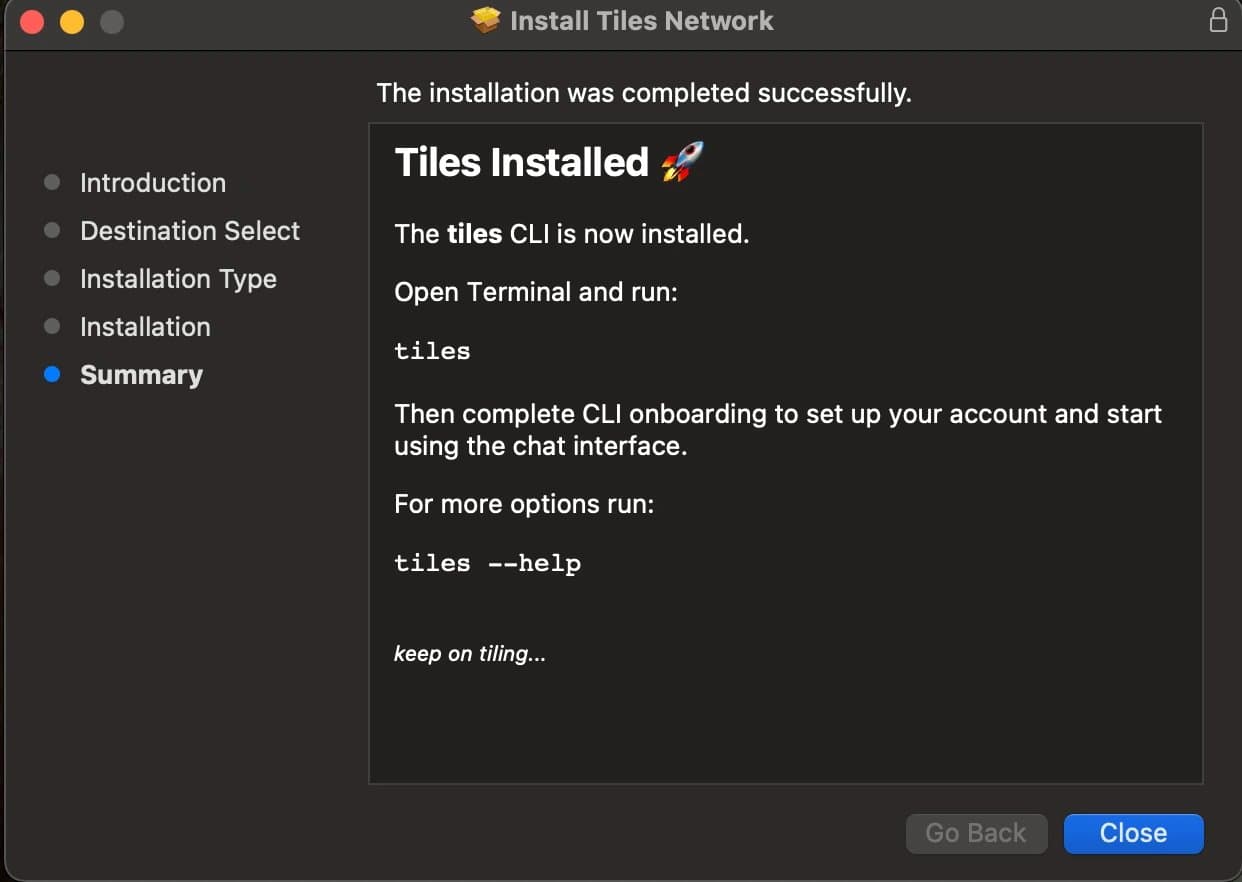
productbuild reads the unsigned package and writes a distributable installer with those customizations baked in.

Code signing the complete installer
productsign \
  --sign "$DEVELOPER_ID_INSTALLER" \
  pkg/tiles-dist-unsigned.pkg \
  pkg/tiles.pkg
That signs the .pkg itself. The Tiles binary is already signed; signing a macOS binary and signing an installer package are different operations.
The main difference is productsign instead of codesign, and the certificate we use is DEVELOPER ID INSTALLER instead of DEVELOPER ID APPLICATION.
Notarizing the installer
Notarization lets Apple scan the payload for malware. We upload the installer; when processing finishes, the service returns acceptance or rejection.
Submission looks like this:
xcrun notarytool submit pkg/tiles.pkg \
  --keychain-profile "tiles-notary-profile" \
  --wait
tiles-notary-profile is the keychain entry name so we do not pass Apple ID details on every run. Store the profile once with:
xcrun notarytool store-credentials \
  "tiles-notary-profile" \
  --apple-id "john.doe@gmail.com" \
  --team-id "X********4" \
  --password "****-****-****-****"
Stapling the installer
Stapling embeds the notarization ticket in the installer file so Gatekeeper needs fewer round trips to Apple when a user opens the package.
xcrun stapler staple pkg/tiles.pkgWhat's next
We also ship a fully offline installer that bundles OpenAI's gpt-oss 20B model, so Tiles can be installed without an internet connection. We are working toward making Tiles itself portable, allowing users to carry their model and data and run it from a flash drive on any compatible system.
The installer requires Rosetta; on Apple Silicon Macs, it is not included by default and must be installed separately. Rosetta translates Intel binaries to run on Apple Silicon. There is a workaround for this, described in the linked GitHub issue.